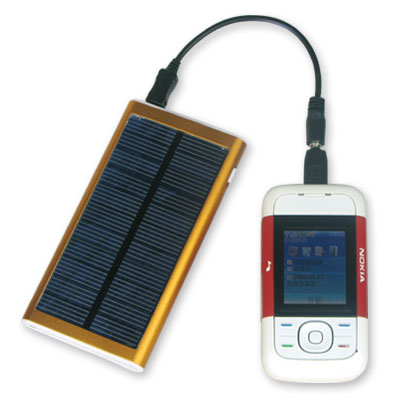
To create a solar charger for your cellphone sounds a bit strange but it is possible to conduct such an experiment at your home. It can be quite inexpensive provided you have some of the materials, or you can manage from some other solar equipments already used at your home.To make a solar charger, the simplest item you can select are the solar cells which can be easily available from calculators, garden lights, etc.
List of the required material
Solar cells from any home device, connecting wires, charger connector for your phone model, Schottky diode, cardboard, soldering ion. It should be noted that, to get the best results out of your cellphone battery, never overcharge (do not leave it for charging entire night or for very long periods). Never charge an already charged battery (if your battery is already more than 30 percent charged, there is no need to charge it). A better practice would be to charge the batteries only when completely drained out. At regular intervals, do not forget to completely drain your battery. Lastly, if you are not going to use your phone or the battery for many days, do not keep the battery inside the phone, make sure you have removed the battery from your phone.
Step 1: Collect the solar cells from the solar equipment available in your house. Generally a smaller solar equipment will have less voltage capacity. This example shows the workaround with a solar powered garden light.
Step 2: Remove the solar charger from the device carefully. When you remove the solar cell (charger) from the device, it will have two wires connected to a main circuit. These wires will be useful to connect the solar cells to your cellphone for charging.
Step 3: Check the voltage and current (ampere) you receive from these cells. You can use a multimeter to check the voltage and current levels generated from the solar cells.
Step 4: Any normal cellphone requires minimum 4-5 Volts of power supply for charging. So, if the power generated from one solar cell is less, you need to hookup more cells.
Step 5: Get back to the equations of circuits. There are two basic types of circuit connections.
- Serial Connection
- Parallel Connection
Serial connection is a connection from positive terminal of one battery to negative terminal of another battery. Hence, doubling the voltage. In parallel connection all positive terminals are linked together and negative terminals are linked with each other. There is no change in the voltage level, but the current level (Amps) value will increase. The more the amp value, the faster the rate of charging.
Step 6: After connecting the terminals, you will need a diode. A diode is a small electronic device with a white band on it. It will appear as a small prototype of something like a duracell battery but in a different color. It is recommend to use a Schottky diode. Diode is useful to stop the reverse charging. Without diode your cellphone battery can be drained out.
Step 7: A female pin connector to connect to your phone. For example, if you use a Nokia phone you will need a Nokia charger female connector pin. This can be used from a dead charger. Cut a long piece of wire from your dead charger such that you can easily connect it to the solar cells.
Step 8: Solder the solar batteries together, connect diode to any one end of the last battery in place and before soldering the charger connector pin, look out for the polarity. Best option is to put the cells in heat and once the batteries are charged connect both the wires of the female connector one by one. It will work only in one direction, it will not be like a light or any other device which can work from any terminal of the battery.
Step 9: Solder the joints and make your entrie package. Cut a cardboard box and fit all the contents in such a way that only the cells are visible from the top.
Step 10: Connect it to your phone and wait for some time. The charging should start. If you want you can also place the charger in such a way it is at the backside of the phone, so you do not have to carry your new charger with you everytime. This is stuck to the back of your phone.
